Installing QuickMunch
Upload the files, create an empty database, and answer four screens. Ten minutes on a normal host.
Before you start
You need three things: hosting that meets the system requirements, an empty MySQL database with a user that can write to it, and the ZIP you downloaded from CodeCanyon.
QuickMunch does not create the database for you — it fills one you have already made. In your hosting control panel (cPanel, Plesk or your host’s equivalent):
- Create a database. Give QuickMunch one of its own, empty. Installing into a database that already holds another application’s tables invites name collisions.
- Create a database user with a strong password.
- Add the user to the database with all privileges. In cPanel this is a separate step from creating either one — it is the step people miss.
- Keep the three values to hand — database name, user and password. The installer asks for exactly these.
Serve the site over HTTPS if you can. Online card payments, push notifications and the installable customer app all need a secure address; plain HTTP is only fit for a private evaluation.
Install
The installer tests the server and connects to the database before it writes anything, so a problem stops you at the screen that names it — never half-way through.
- Upload the files. Unzip your download, then upload
quickmunch.zipto the folder your domain serves — usuallypublic_html— and extract it there. One upload rather than thousands of files. Visitors are routed into the application'spublic/folder automatically; if your host lets you point the domain's document root atpublic/directly, even better. A sub-folder install (example.com/order) works the same way — upload there and nothing needs changing, though its addresses carry a/public/segment unless you can point the document root atpublic/. - Open your site in a browser. With no configuration file present you are sent to the installer automatically. If you land on a blank page instead, the folder permissions are usually the cause — see below.
- Pass the requirements check.
The first screen tests PHP, the extensions and the writable folders. Anything marked required must be fixed before you can continue; warnings can wait.
Every row that fails carries its own fix hint, so you can hand the line straight to your host's support if the server needs a change.
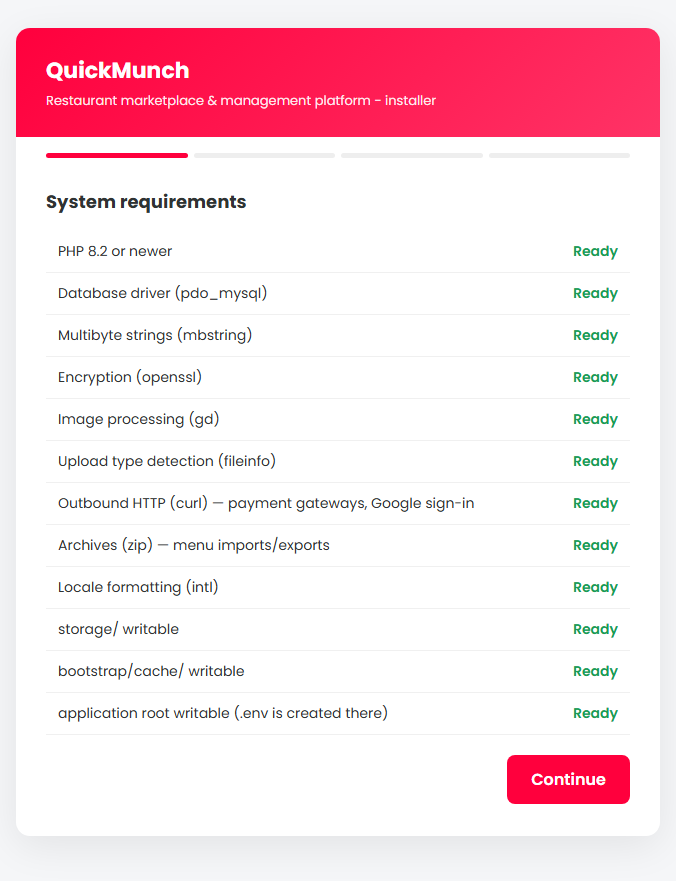
Only rows marked required block the Continue button. Click to enlarge. - Enter the database details. The numbers match the numbers on the screen:
- Host — usually
localhostor127.0.0.1. - Port — leave
3306unless your host says otherwise. - Database name — the empty database you created above.
- Username — the database user you added to it.
- Password — that user's password.
- Table prefix — keep
qm_unless you must share the database.
Then press Test & continue. The installer connects before it writes anything, so a wrong password fails here rather than half-way through.
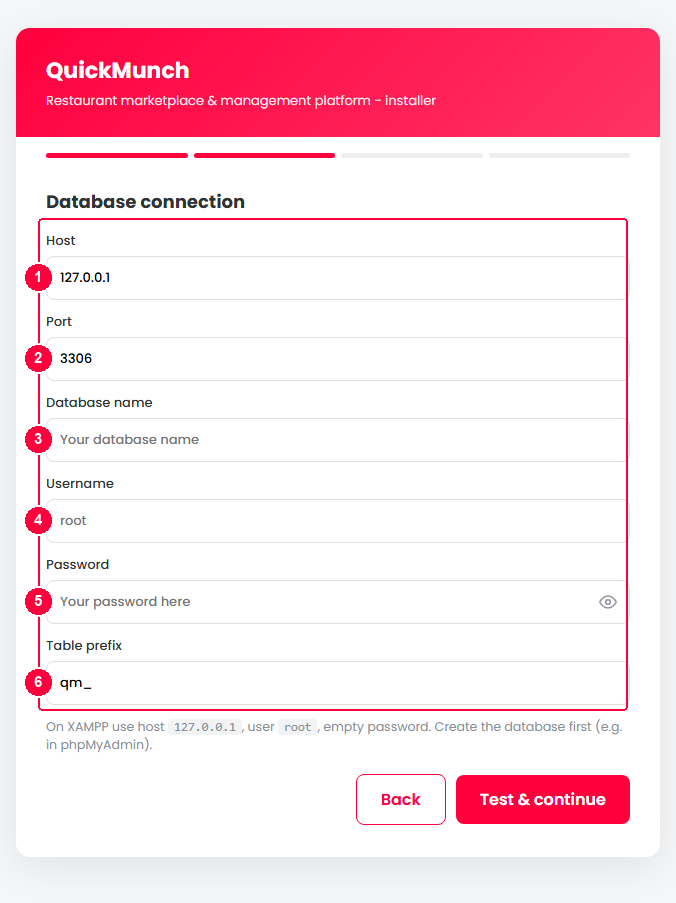
The database step. Click to enlarge. - Host — usually
- Name your site and create your administrator.
The site name and address are filled in for you — change them if you like, or leave
them; both are editable later under Settings → General.
This is the account you will run the platform with. Use a real email address — password resets and system notices go to it.
The password needs at least 12 characters.
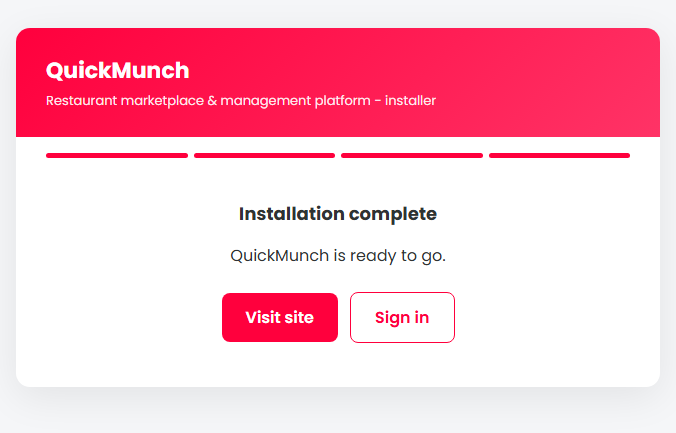
This is the press that installs everything: the tables, the sample content and this account all arrive together, so it takes a few moments. The seeded demo administrator is claimed rather than joined — its name, email and password become yours — so when the installer finishes, your details are the only administrator credentials that exist.
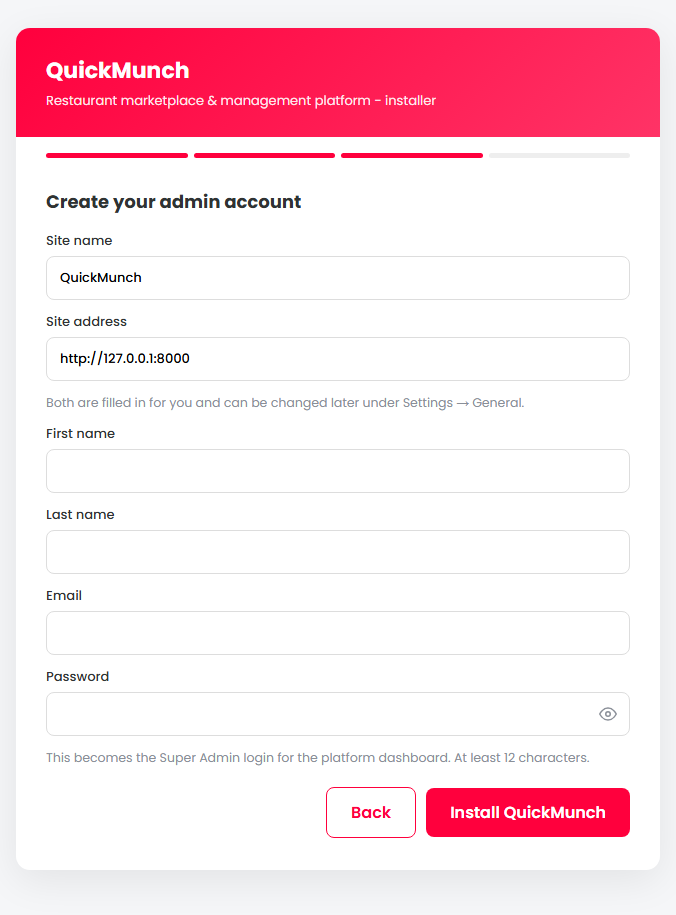
Your Super Admin login. Click to enlarge.
After the installer finishes
- Sign in as the administrator you just created. The installer never asks how you run your business: every install starts as a marketplace, and you change it whenever you like under Settings → Business model — where each option is shown with the money flow it produces, rather than decided before you have seen the product.
- Set up the scheduled task. Several jobs — order clean-up, payment reconciliation, scheduled reports — only run if something calls them. See Scheduled tasks.
When it doesn't work
A blank white page instead of the installer
Almost always folder permissions. /storage, /bootstrap/cache,
/public/uploads and the application root itself (the installer writes the
.env configuration file there) must be writable by the web server. Set them to
755 first; some shared hosts need 775.
"Access denied" on the database step
The user exists but has no rights on that database, or the password is wrong. In cPanel, adding a user to a database is a separate step from creating it — it is the one people miss.
The site loads but every link is a 404
URL rewriting is off. On Apache, enable mod_rewrite and allow .htaccess
overrides for the folder. On Nginx, add a rule sending everything that is not a real file to
index.php.
It says the site is already installed
The lock marker /storage/installed already exists. The installer writes it (along
with the .env configuration file) the moment your admin account is created, so its
presence means the install finished. To start again, delete the marker — and be aware that the
database keeps whatever is already in it.